Friday, 23 August 2013

Fancy a holiday?

Fancy getting away from it all for a bit?  Need to attend to some family business? How on earth do you go about leaving the place, with all that needs looking after?

Well it can be done with a little prior planning and preparation.  Depending on how much needs attending to whilst you are away, will depend on who you can ask and how often they need to visit.

Friends and neighbours can be called upon to put chickens to bed and let out in the mornings, but their level of knowledge and confidence will depend on how much more they feel they can cope with; someone more professional with more experience may be needed, who will come and house-sit full-time.  The appointed person will come and ‘live-in’ for the duration of your holiday, giving you peace of mind whilst you are away with regards to security.  This works excellently if you have household pets, e.g. dogs and cats, as it means their routine is not disturbed.  All your required jobs will be fulfilled by the sitter, i.e. all animal feeding and watering, dog walking, polytunnels/greenhouse watered.

Finding a house sitter, can be a little problematic in itself.  Who is capable, knowledgeable and trustworthy?  Word of mouth is an excellent way, as you get an instant reference as a bonus.  Local smallholding societies who produce monthly magazines may advertise someone local, plus the internet is a good place to hunt too.   The person you choose ideally should be CRB checked, have full third party liability insurance and be able to provide references for you to follow up.

Before committing yourself, you should arrange for them to come for a pre-holiday visit, to view the property and you all get to meet in person.  This gives you an ideal opportunity to see if the person is suitable, if you like them, (they are staying in your house after all), and if they are willing to take the job.  Post visit you can, discuss payment, duties, start and finish dates.  Be prepared to pay a reasonable amount, labour is not cheap and they will be responsible for your property twenty four hours a day.

Whoever you choose, you need to make sure the appointed person understands exactly what needs doing.  Draw up a comprehensive list of duties, e.g.
·        
CChickens
AM – Feed and top up water.  Collect eggs
PM – Let out.  Collect eggs
EVE – Close up run and pop hatch.  Remove feed hopper to shed

·         Leave contact details for yourself and where you are staying, including any mobile numbers.
·         Leave details of where all feed and equipment is kept and where the keys are if any buildings are locked.
·         Notify Vets and the knacker man that you are away and who is staying in your place.  Also leave their contact details in the house for emergencies.
·         Let neighbours/close friends know who is staying, in case they pop in ‘on the off chance’.
·         Leave details of household necessities – bin collection days, stop taps, electricity meters.
·         Anything else you can think of – Central heating squeaks when first comes on, tap drips in kitchen, any vehicles being left at home, for security purposes.

Your expectations of the house sitter should be reasonable too.  Don’t expect them to take your dogs for a five mile walk if you don’t.  Make sure your feed and forage supply is adequate for the duration of their stay.  Also ensure your fencing is secure – enough said!  If it’s winter time, ensure a plentiful supply of heating fuel – oil, coal, logs, whatever it is you use.  The easier and more comfortable you make it for them, the more likely they are to want to come back.


The whole process may seem daunting at the outset, for both parties, but if the house-sitter is experienced in these matters, then all will be well, leaving you to relax and enjoy your time away in confidence.                       

Thursday, 22 August 2013

How to make a Rat Bait feeder

Now being very rural here, we get 'bothered' with rats pretty frequently.  They burrow into the polytunnel and eat the tomatoes on the lower leaves and also help themselves to the chicken feed, not to mention that they've had two of my chicks.  So Michael makes his own secret feeders with attractive rat food in them.

The key with rat bait, is to keep it in place all year round, so the rats get used to it being there and to change your brand each time you run out, so that they don't get immune to the stuff.

Get hold of a length of 110mm plastic drainage pipe


Cut off a piece 1 & 1/2 metres long, no shorter as the bait will come out, and then birds and chickens will be able to eat it.


Off that 1 & 1/2 metre piece cut off approximately 150mm to make the cover.


On the longer piece, cut out a slot in the middle, in which you will pour the feed.  Make it smaller than the small cut piece, so that the cover will completely cover the hole.


Take the smaller cut piece and cut all the way down the long side, on both sides, but not exactly opposite each other, so that when you put in on the long piece it forms a secure clip.


Your rat bait feeder is now ready for use.


Keep it topped up at all times and clear up any spillage, so that garden birds and chickens cannot get near the poisoned corn.


As you can see above, Michael has secured the feeder with two stakes hammered into the ground, up against the fence.  Don't forget to replace the lid!


Wednesday, 21 August 2013

Great British Bake off inspiration

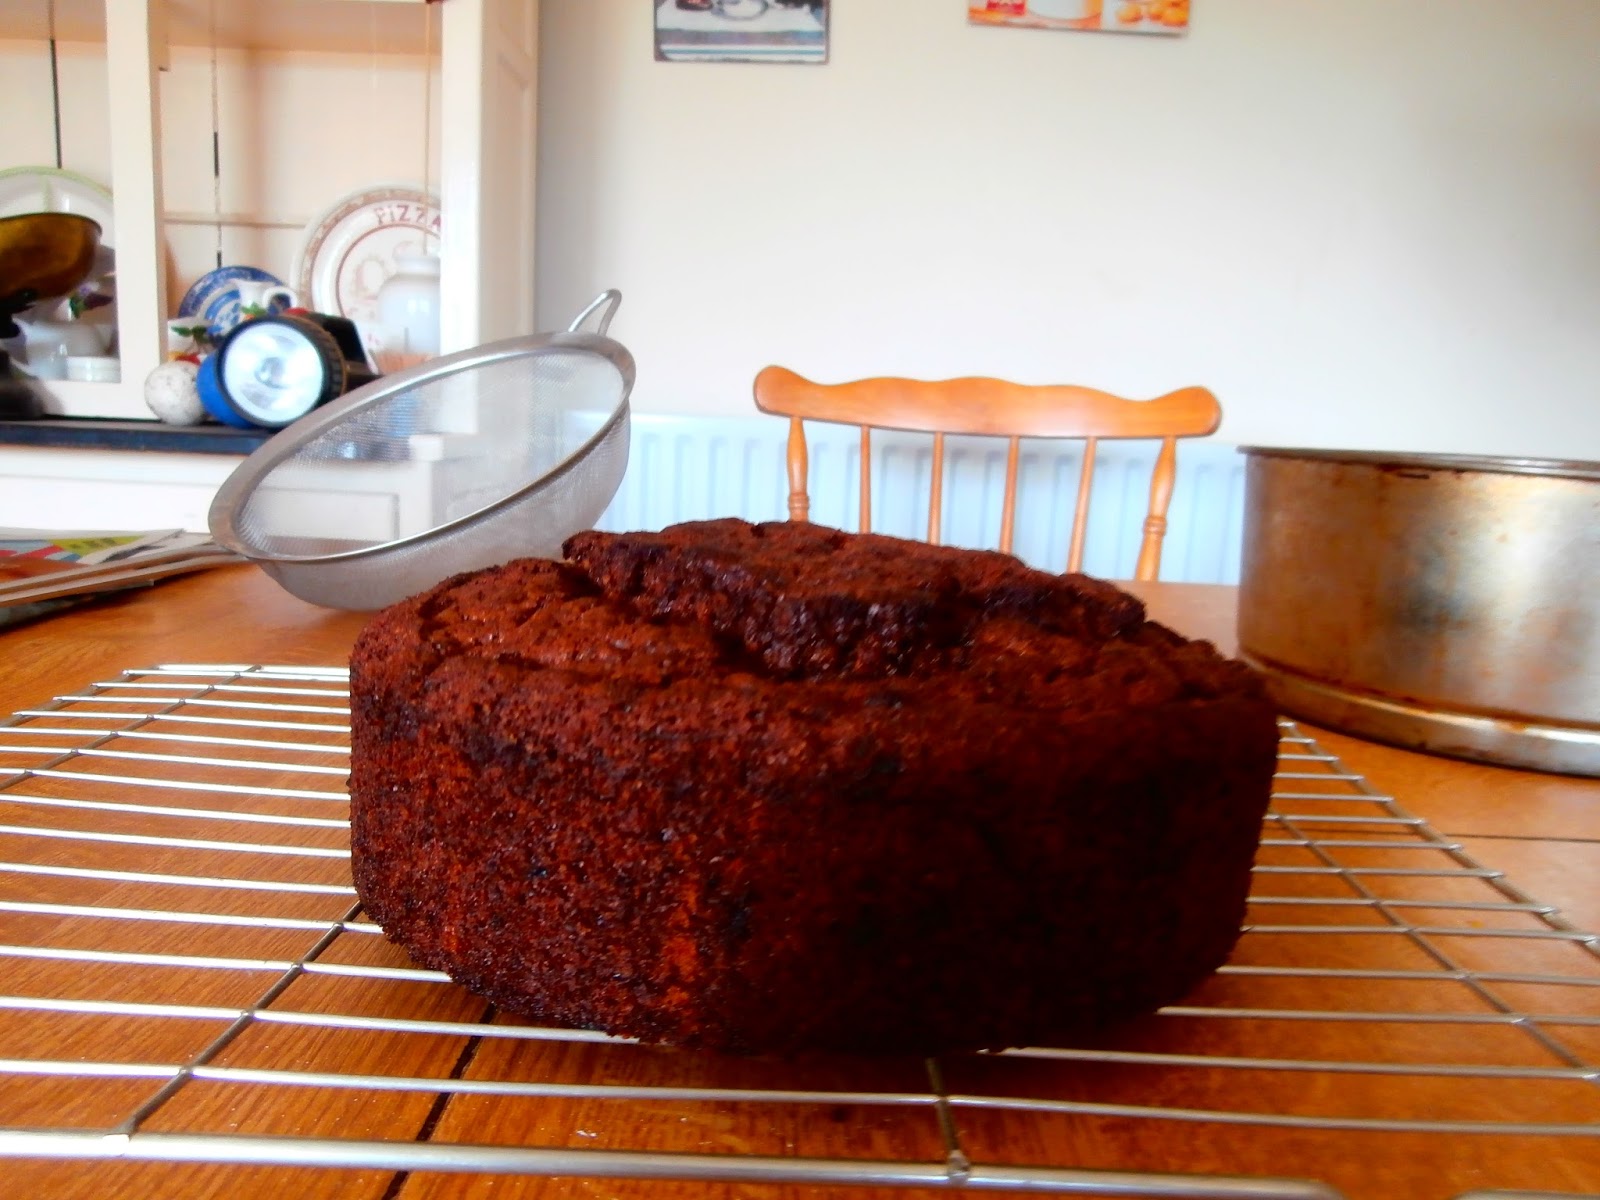
Inspired by the new series of the Great British Bake off, and keeping smallholding traditions alive, I've dug out an old favourite of ours - Chocolate Courgette Cake, don't worry you can't really taste the courgettes, it's a bit like the carrots in carrot cake.

I found this recipe in an edition of a smallholders magazine, cut it out and stuck in into one of my home-made recipe books.  I can't remember which magazine it was in, it was a number of years ago now, but I bring it out every year in courgette glut season.

Ingredients -

200g / 7oz Plain flour
1 tsp Baking powder
1/2 tsp Bicarbonate of soda
1/2 tsp Salt
115g / 4oz Sugar - I used granulated
2 Eggs
175ml / 6 fl oz Vegetable oil - I used sunflower
175g / 6oz Plain chocolate - use the best you can afford, I used Bournville
225g / 8oz Courgettes - doesn't matter what colour, mine were yellow


  • Sift together the flour, baking powder, bicarb, salt and sugar

  • Beat the eggs with the oil in a separate bowl

  • Place the chocolate in a Bain Marie, or in a bowl over a pan of hot water and let it melt slowly over the heat, don't let the chocolate bubble
  • Grate the courgettes and squeeze them gently to get rid of excess moisture
  • Beat the eggs and oil mixture into the dry ingredients and stir in the melted chocolate and courgettes

  • Spread the mixture into a greased cake tin, I used a deep round one that I make the Christmas cake in, and bake at 180Deg C / 350Deg F / Gas 4, for between 30 - 60 minutes.  If you find the top getting burnt and the inside still yet to finish cooking, place a sheet of tin foil over the top.
  • Remove the cake from the tin and let it cool.  Serve on its own or with cream, yoghurt etc


The finished cake - enjoy!

Stats today -

Eggs produced = 10

Sales -
1/2 dozen eggs £0.90

Expenses - 
Nil

Tuesday, 20 August 2013

Fab tomato recipe

I was watching Saturday Farm a couple of weekends ago with Dick Strawbridge (of telly smallholding fame), and he demonstrated a recipe of Tomato Tarte Tatin.

Now I'm always a fan of using home grown produce, but am never that imaginative, I always need a little help in that direction.  So watching him demonstrate the recipe was great, he made it look really easy and it was a brilliant way of using up a lot of tomatoes in one go.  Here's how he, then I did it -

Ingredients -
Pack of frozen puff pastry - I've since done the recipe again and tried it with half of one slab of pastry and it worked fine.
8-10 Large tomatoes - depending on the size of your dish
1 Onion or up to six shallots
Slug of Olive oil
Several good shakes of Balsamic vinegar
Salt and Pepper to taste

Heat oven to 180 degrees Centigrade, Gas 4
Slice the tomatoes horizontally - so you have the nice pattern, i.e. not down through the stalk
Chop onion finely
Heat the slug of olive oil in a large frying pan and add onion. Cook and let them caramelise slightly.
Add the tomatoes to the pan, cut side down to start with, turning them over when they just start to break down.
Grease your dish with butter, I use one that is about 20 cm across.
Roll out your pastry, then place dish on top and cut round, slightly bigger than the dish.
Add a good few shakes of balsamic vinegar to the tomato pan, plus the salt and pepper, let this cook for a minute, then take off the heat.  Take each tomato half and place cut side down in your dish, then spread the onions over, adding any juice from the pan too.
Place your pastry on the top and put in the oven for 30-40 minutes.
Take out of the oven, the pastry should be lightly browned and risen, see pic below.


Take a dinner plate and placing it over the top of the dish, then invert, to leave the tomatoes on the top and pastry on the bottom.

The finished article - juice will come out of the tomatoes, because of their freshness

I served mine with potato wedges and a side salad - all from the garden of course!  The second time I made it I used Plum sauce instead of Balsamic vinegar and it tasted excellent too.

Do let me know if you try this and what ingredients you use.  It would look fabulous with different coloured tomatoes and maybe some spring onions too for extra colour.  It's also really tasty cold - if it lasts that long!

Stats today -

Eggs produced = 12

Sales -
Nil

Expenses -
Nil


Monday, 19 August 2013

Pesky Pests

I've had two main pest problems in the garden this year, cabbage white butterflies and moles.  I've talked about cabbage whites in earlier posts and the tribulations they've given us, the moles on the other hand have silently and unknowingly caused problems of their own.

The polytunnel is 80% full of tomatoes and every single plant has been undermined by the moles tunnels, excavations and hills.  Watering has been eventful as all of a sudden you find the hosepipe stream disappearing into a tunnel instead of on the soil around the plant.


Now I'm an animal lover and understand that all animals need access to shelter, but if they'd just moved twenty metres further away then they would be in the field and could tunnel away to their hearts content, have huge 'houses' out there and keep me happy too.  So I did some research in the library this afternoon, to better acquaint myself with the blind little critters.

It seems they are extremely sensitive to sound and scent and so various deterrents tend to use this to their advantage e.g.


  • Mothballs placed in the tunnels
  • Rags/material placed in the tunnels that are soaked in paraffin or some other highly flammable substance and set on fire!
  • Shop bought smoke bombs
  • Plastic bottles buried into the tunnels - the air that moves along the tunnel vibrates across the 'open' top causing a noise
  • Brambles placed in the tunnels - Ouch!
  • Soiled cat litter placed in the tunnels - Nice!
  • Traps can also be used that entrap the mole, killing it in the process

Those are the more normal ways apparently, there are some more obscure ones -


  • Buy a cat - cats will go out at night and catch moles and other damage causing animals - didn't know cats dug out moles, but I suppose it's when the mole surfaces that they catch them
  • Using an organic fertiliser containing castor oil meal.  Apparently it is poisonous (very organic - NOT!), but enriches the soil and discourages rodents of all types over a long period of time
  • The planting of caper spurge is a traditional method, which is to supposed to deter them - but I wanted to plant vegetables
All this to me seemed a lot of hard work for a few little creatures that were only trying to keep their house in order, and/or set up house for the first time.  I think I'll just carry on squashing the soil down around my tomato plants to level out the soil and raking out the molehills, they've got to live somewhere.


Molehills at various places in the garden - they certainly pick their places!

They do also have some endearing qualities, as they feed on chick beetles, cutworms, leather jackets and wireworms, and as I don't seem to have had a problem with any of these, maybe I should just be thankful for the moles and not all those listed above; they are after all a sign of good soil health as they feed on earthworms, so maybe I'm doing something right after all.

Stats today -
 
Eggs produced = 13

Sales -
1 dozen eggs £1.80
3 x 400g Tomatoes £3.00
1 x Cucumber £0.60

Expenses -
Nil

Sunday, 18 August 2013

Another tidy up

Had a right good, and yet another, tidy up this weekend.

The brassica end of the garden had become overgrown with weeds, which had grown to the same height as the brassica's, unfortunately not putting off the Cabbage white butterflies, who flew in earnest and dogged determination to find their 'prey'.  So we set about pulling out the weeds and eventually saw the fruits of our labours in some fabulous looking brassicas.  We were delighted.  We won't starve this winter.


Unfortunately they haven't survived the onslaught from the cabbage white's so at least another hour or so was spent squashing newly hatched caterpillars and smothering yellow clutches of eggs.

The next task was tidying up the tomatoes in the polytunnel, again.  I seem to be forever in there!  I don't think I'd remembered how labour intensive tomatoes can be.  The plants are overflowing with fruit and as a result getting tremendously heavy,  the stems are really struggling to cope.  I waded in with yet more canes and copious amounts of string, taking off unwanted leaves and side shoots as I went.  Due also to the amount of fruit on them I took off the tops to stop them producing any more. At least half of the plants had completely fallen over, the existing canes either snapped at soil level or just not man enough to cope with the weight.  Emerging two hours later, the polytunnel was tidy and happy again; I on the other hand needed to take a scrubbing brush to my hands!


Well pleased with the toms this year though, looking forward to eating them!  Have also declared I am no longer eating supermarket tomatoes, they are expensive and tasteless, rather just have a green salad.

Stats today -

Eggs produced = 13

Sales -
1 dozen eggs £1.80
2 x Cucumbers £1.20

Expenses -
Nil

Friday, 16 August 2013

Leftover Beef Sturry

Tonight's delight is using up leftovers together with what we have available in the garden.  What true smallholders we are!

Seriously though, I hate wasting food, although I must admit not much gets wasted here, what with seven dogs, two pigs, sixteen hens and a cow.  But with the increase of food wastage always in the news and yesterday Natalie Coleman (winner of Masterchef), was on BBC Radio 2's Steve Wright in the afternoon, talking about her new campaign, 'Love food, Hate waste,' I always try and do something edible for us to eat with leftovers.

So tonight's leftovers being beef and it being Friday, well it had to be a curry - well sort of!  I am renowned for not sticking to recipes's, so I put my own twist on this 'curry'.  Michael likes lots of vegetables in his curries, not just a meat and onion curry with rice, so I raided the garden and collected - a large handful of french beans, a yellow courgette, a kohl rabi, one small carrot, half a dozen shallots, about twenty tomatoes and two chillies.

Collected from the garden

Plus, the already chopped tomatoes and shallots

I chopped all these up and placed them in a large casserole dish, along with the chopped up beef (minus any fatty bits - the dogs ate these!), added some water and a good shake of Bisto gravy granules, just to up the 'beefyness' and to thicken the sauce and put it in the oven for about an hour and a half.


 and this is what it looked like when it came out -


I served it with turmeric and parsley basmati rice and a shop bought naan bread each (which were horrible) -


It tasted delicious, you could taste all the vegetables and the beef was soft and succulent.  The two chillies were enough if you like it quite spicy.  I do think that this type of dish is best cooked in a slow cooker all day, left to bubble away and develop the flavours even deeper, it was a mistake not to do it with this I think.

Stats today -

Eggs produced = 9

Sales -
Nil

Expenses -
Nil

Thursday, 15 August 2013

Beef, glorious beef

Now if you're a meat eater, like us, you'll love a good piece of roasted meat, whichever is your favourite, mine just happens to be beef.  I can't resist a good sized lump of home grown, properly reared beef, and this just happens to be our own too.

We breed Dexter cattle for our own freezer and sell a small quantity to local friends.  The popular stuff always runs out fast - steak, roasting joints; then I have to find umpteen ingenious ways to use all the mince and stewing cuts I always have left over.

I do a lot of batch cooking, so tend to take out about six packs of stewing beef at a time and fill my two large slow cookers with beef and vegetable stew, leaving them on all day to bubble away happily.

Dexter meat is rich tasting, ours very rarely eat anything but grass or haylage, this being the best dexter food as they are a slow growing cattle, being able to be fattened from grass, with extra forage in the winter.

We hang our carcasses for four weeks, which gives the meat a wonderful dark red colour, and a flavour second to none.  Our butcher is excellent in his cutting and preparation work, and liaises with me when I've sent a beast to the abattoir very well.  I then go and collect copious amounts of joints, steaks, packs of mince and stewing meat, plus all the offal and a box of bones for the dogs!

We have a slight difference of opinion in the house as to how it gets cooked though.  Myself I like it medium, whereas Michael likes it well done, so I try to cook it somewhere in between.  The marbling you get on Dexter beef is second to none, filling the meat with flavour.  I always let mine rest for at least half an hour before carving and always use the juices in the gravy.

For more information about Dexter meat and where you can buy some please visit - www.dexterbeef.org.uk

This is one I cooked yesterday -


You can plainly see the line of fat down the middle and coating around the top, keeping all that flavour in.  This will get used in sandwiches and salads now, but won't be around for long!

Stats today -

Eggs produced = 10

Sales -
1 & 1/2 dozen eggs £2.80
1 x Geranium plant £1.50

Expenses -
Nil

Wednesday, 14 August 2013

The best and easiest crumble recipe EVER!

This is just the best crumble recipe ever, or so I've found up to now!  AND it's so easy - Bonus!

I even make double batches because it freezes so well.

Taken from Prue's New Country Kitchen, by Prue Coats, pages 152-153, which is available on Amazon, starting at just one penny, plus P&P.

900g Fruit - any you like, I frequently use apples, plums, rhubarb, rasps, or even a mixture of tinned fruit.
Sugar

175g Plain flour
110g Butter
110g Demerara Sugar - to be honest I just use whatever I've got, light brown, granulated white etc
75g Rolled Oats - again I use whatever oats I've got - porridge etc
75g Flaked almonds
75g Ground almonds

Pre heat oven to 200 Deg C/400 Deg F/Gas Mark 6
Cook the fruit lightly, spoon into a dish and allow to cool, sweeten to taste with the sugar if required - I don't tend to bother cooking or sweetening it before I put it in the oven.

Rub the butter into the flour until it resembles breadcrumbs
Mix in the rest of the other ingredients
Spoon over the fruit and bake for 30 - 40 minutes
Serve with custard, ice cream, creme fraiche - whichever is your favourite

ENJOY!


Tuesday, 13 August 2013

Chicken hut considerations - Part two

As I said yesterday there are umpteen designs of poultry house, in fact we have two completely different designs here - see photo's below.  I must admit I do like the houses that are raised off the ground for several reasons; security from rats and foxes; warmer as the hut is not sitting on the cold ground; a dry area in case it rains.

This one we purchased a few years ago, complete with the chickens, as somebody Michael was working for had just had enough of them.  It has a detachable run, and the main hut is off the ground, the pophole door is also closable at night.  I love this hut, it has everything you need in a serviceable hut for chickens.

The side lifts out for ease of cleaning

The roosting perch also lifts out for ease of cleaning

The pophole at the front, with replaceable door

Nesting boxes attached to the side of the hut

I find this a really easy hut to live with, apart from the nesting box lid has no catch on it, so you have to prop it open with your elbow when cleaning and collecting eggs.

I have just cleaned both the houses out today and on the one above I find it easy if I put a newspaper layer in the bottom of each of the nesting boxes then the bedding on top, you just then lift out the newspaper with the soiled bedding on top.

The other house we have is a 'made by my husband' one, many years ago.  It is wonderful and has seen many chickens over the years.  It is larger and can house up to fifteen hens, whereas the above one can house approximately ten.


This was our very first chicken hut that Michael made when we got together, some twelve years ago or so. It has seen some use, but is still perfectly serviceable.  Again the run is detachable.  We find having a run on the side a real bonus.  It allows the chickens to be out, but they then lay their eggs in the hut, which makes for easy collection.  They are then let out in the afternoons to scratch and dust bathe.  

Inside both runs are a drinker and feeder, stood on a large lump of wood, to make it easier for the chickens to reach.  As you can see the run above also has an openable door - this is a new addition, before you had to heave the run about each time you wanted to let the hens out.


Both lids on the top of the run are moveable too, which makes it easier when putting in the drinker and feeder.


The difference with this house is that it doesn't have any nest boxes, a mistake Michael always says.  The hens lay their eggs on the floor in the left hand corner of the hut (as you look at the picture).  The eggs can get dirty because of this as the perches are directly above where they lay, I do have to be scrupulous in my cleaning in that area.  Can you tell I'd just put clean straw in?  Such inquisitive creatures.

Tomorrow I will look at beddings, feeds and other equipment needed to kit out your house.

Stats today -

Eggs produced = 11

Sales -
1 dozen eggs £1.80
2 x 400g Tomatoes £1.50
1 x Cucumber £0.60

Expenses - 
Nil